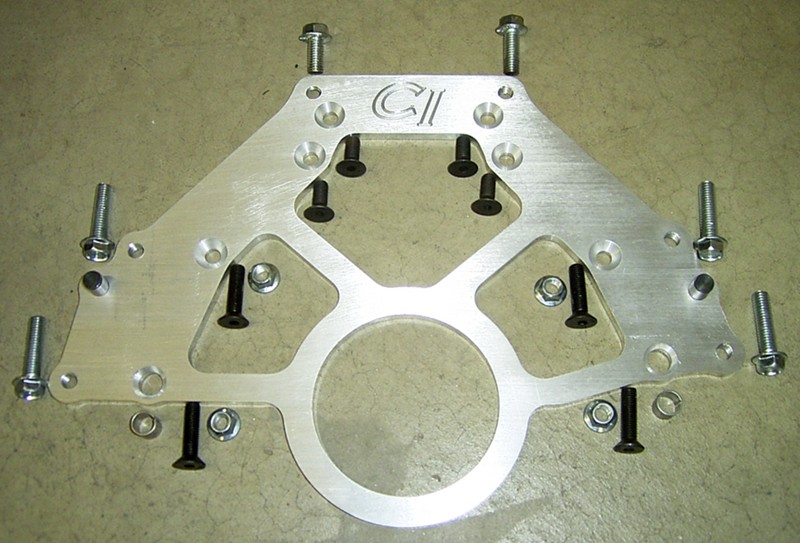
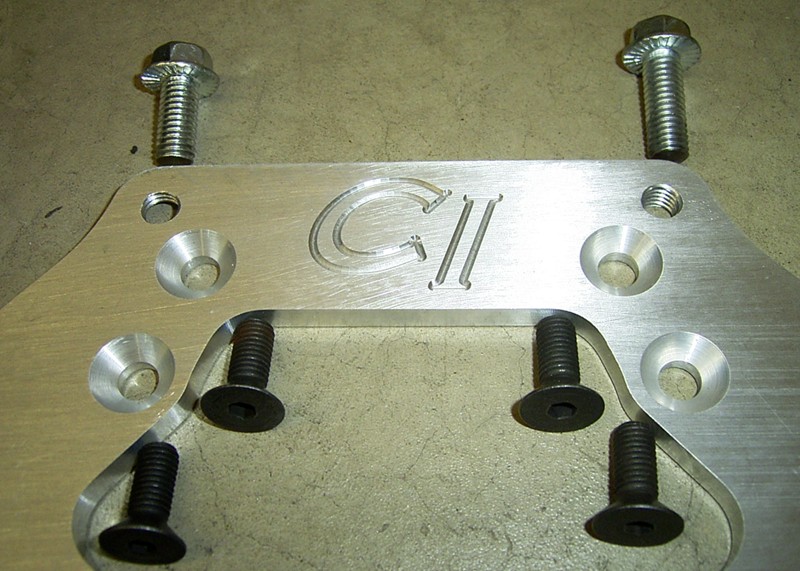
I purchased the plate
from the website
The adapter plate comes will all hardware to attach the adapter plate to the
2.3 block and the bell housing to the adapter plate.
Contents do not include SAE starter bolts used on the 5.0 bell housing, the two bottom bolts that attach the bell housing front plate to bell housing.
You will also need to purchase a 5.0 clutch cable.
Of course you will need the E6 5.0 bell housing, 5.0 clutch disc, pressure plate, and throw out bearing. A 5.0 flywheel will need to be purchased, I purchased the Spec flywheel from Stinger Performance, see below.
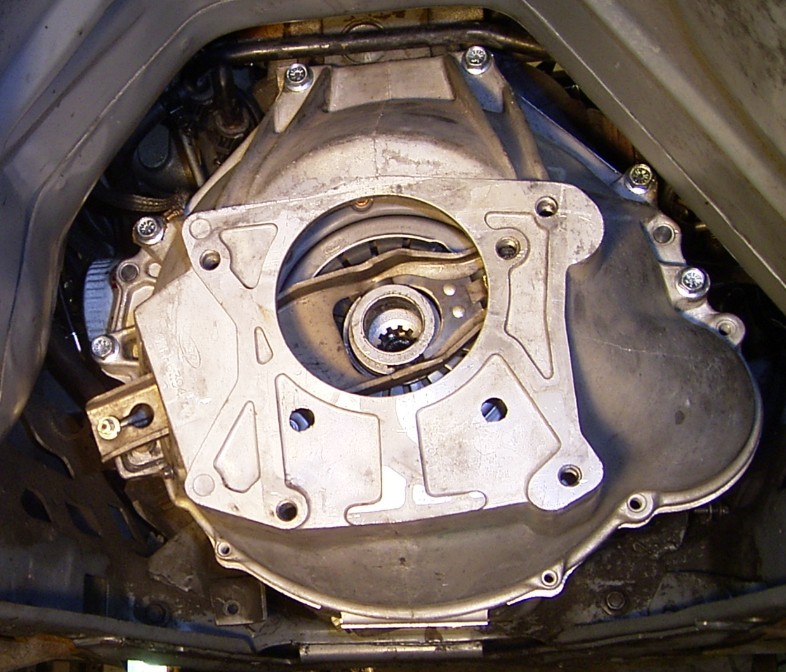
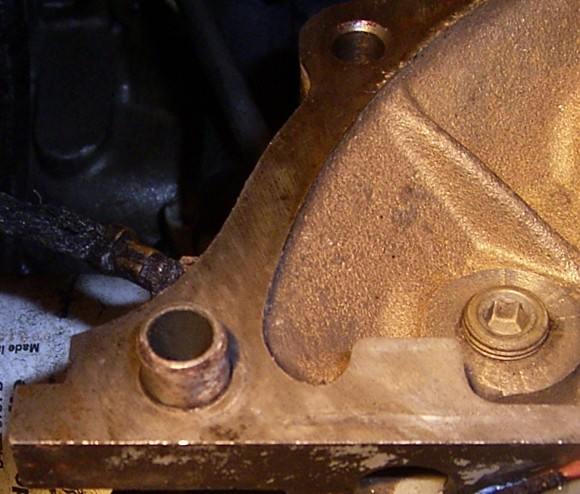
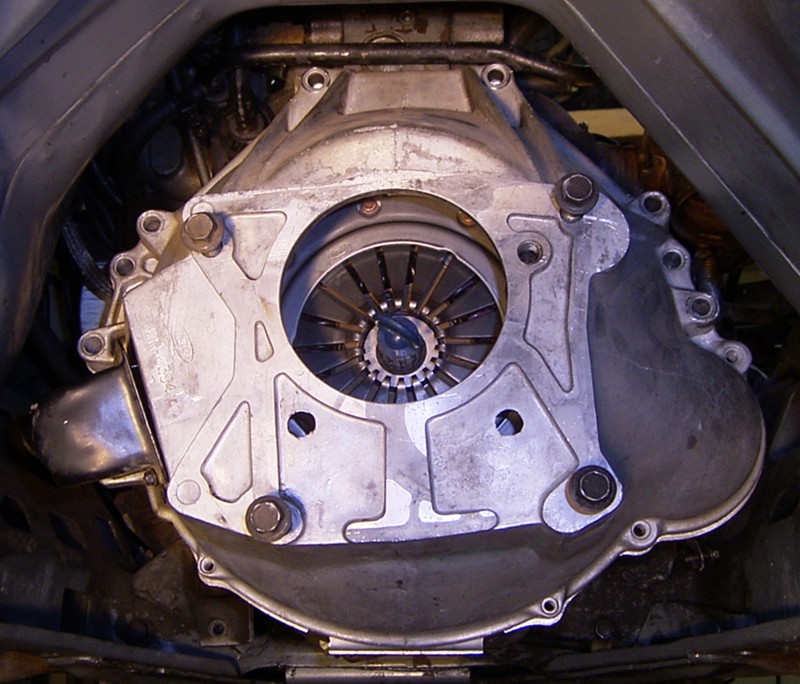
Here is the stock 2.3 bell housing mounted to engine - reference photo.

I cleaned the back of the block with a can of brake cleaner. It is
also a good idea to install a new rear main seal and pilot bearing while
everything is apart.

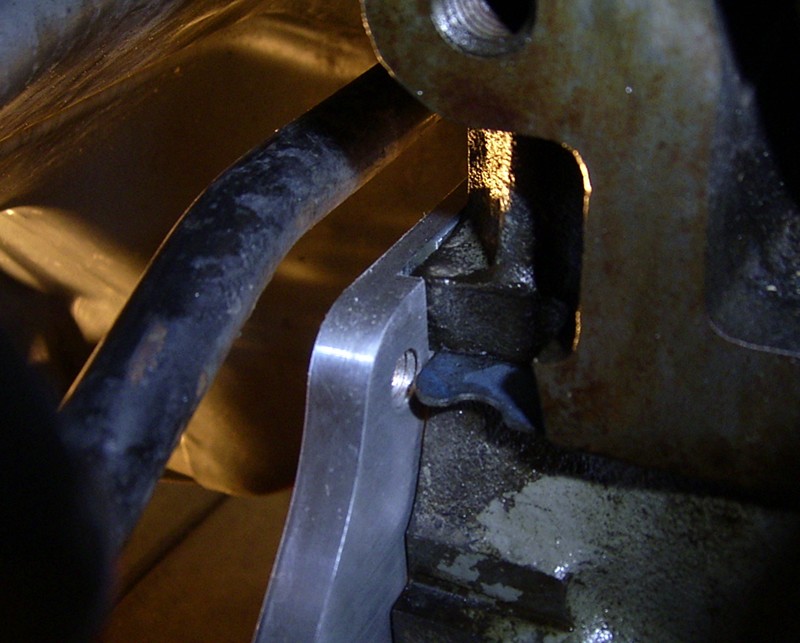
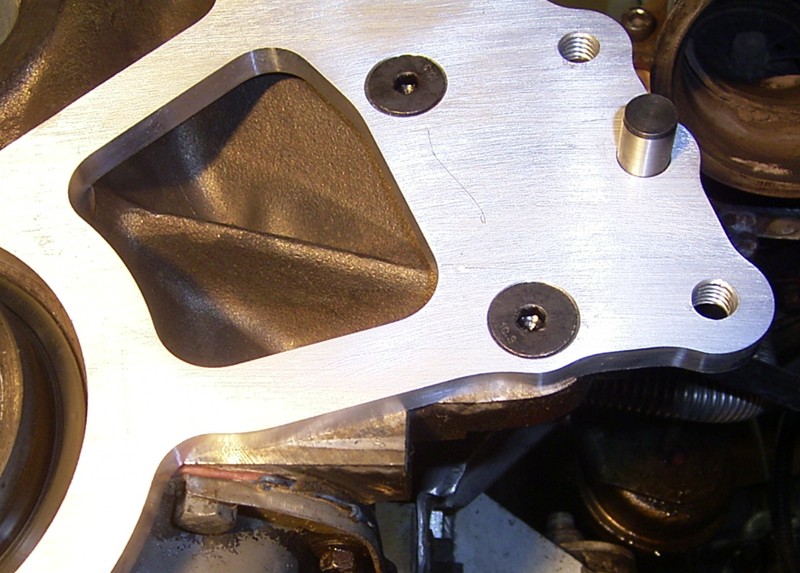
The adapter will require a shorter dowel pins. I removed the longer
dowel pin (left) with vice grips.
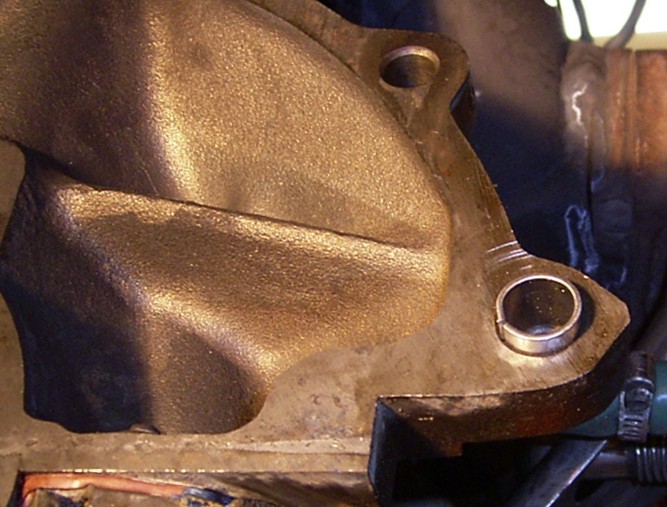
On the left the old pin, on the right the new shorter pin.
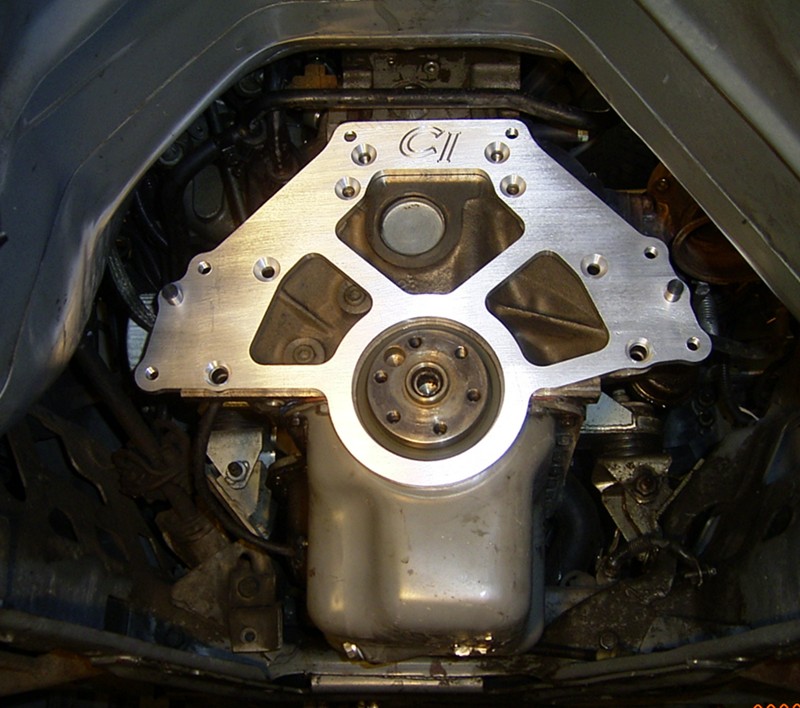
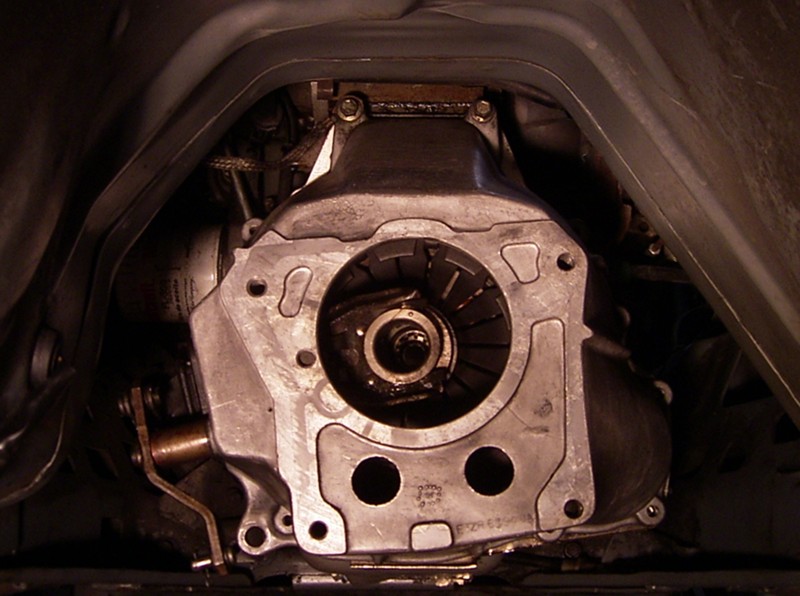
Install plate on new dowel pins and start installing bolts.
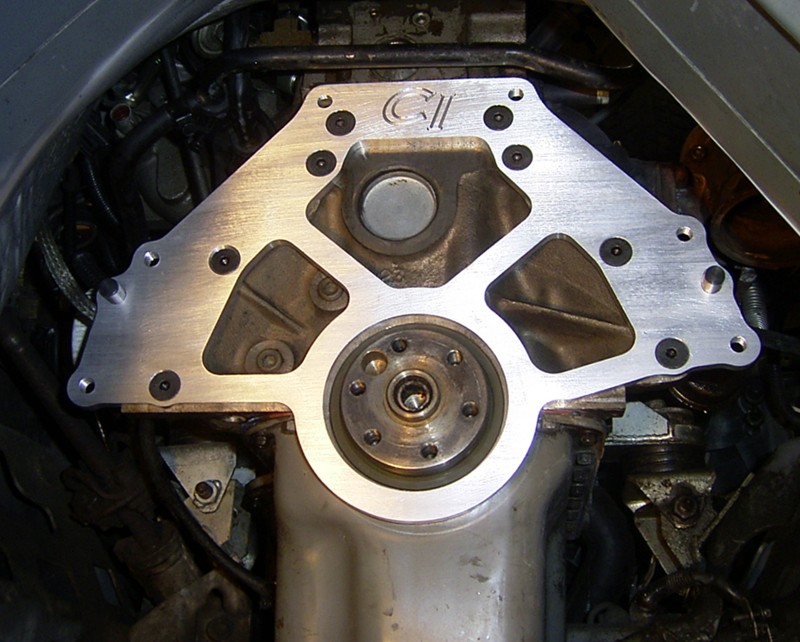
Install bolts. I recommend purchasing a 6mm hex socket to properly torque
plate to 28-38 Lb-Ft I used loctite blue on the upper 4 bolts that
thread into block and torqued. The bottom 4 bolt have lock nuts, no
loctite, just torque.
Plenty of room for the starter.

I purchased the Spec aluminum flywheel SF05A-2 from
Stinger Performance.
Pictured on the right is the stock 2.3 iron flywheel.
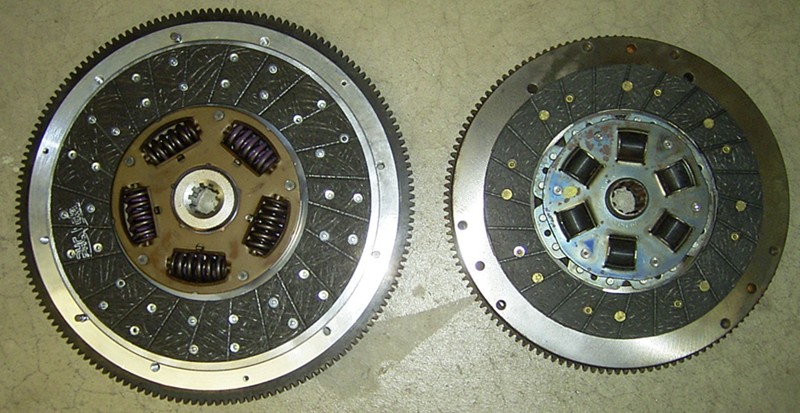
I also chose the Ford Motorsport King Cobra clutch kit. Pictured on
the right is the Centerforce dual friction clutch.
The combined weigh of the iron 2.3 flywheel, centerforce dual friction clutch and pressure plate is 30#
The combined weight of the 5.0 Spec aluminum flywheel, Motorsport King Cobra clutch and pressure plate is 26.5#
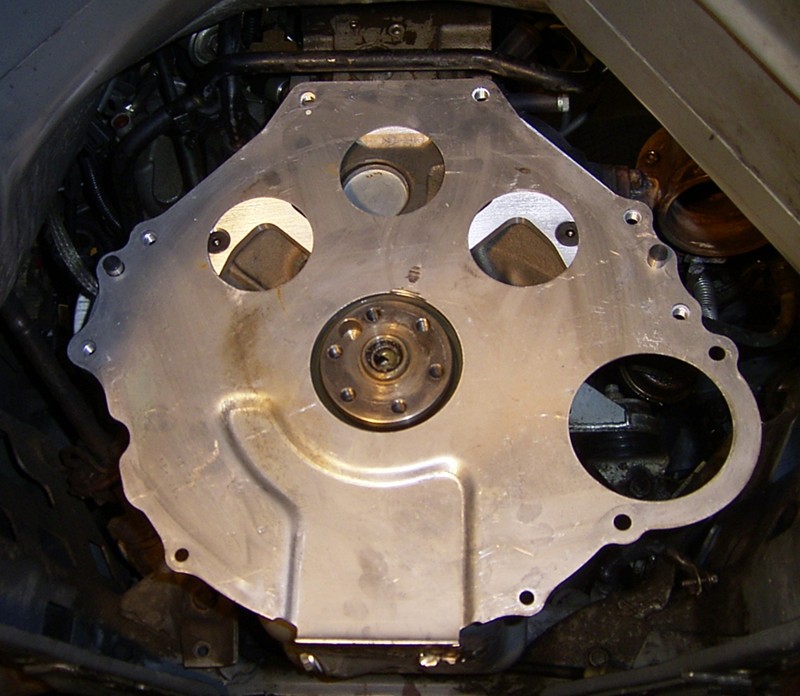
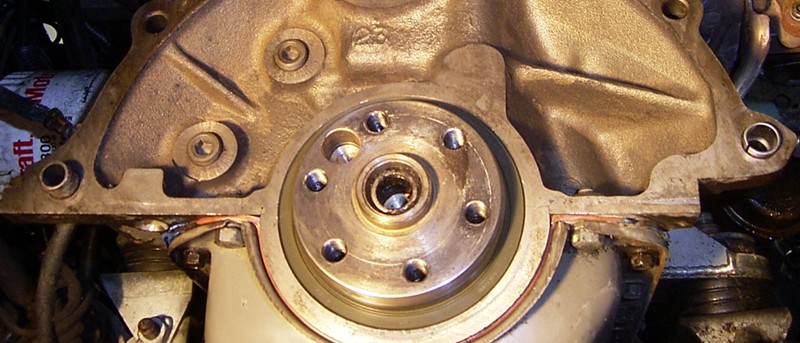
Make sure to install the bell housing front plate on the alignment pins.

Install flywheel and torque bolts. I choose 75-85 Lb-Ft of torque for
this application.

Install clutch disc and flywheel. Use the supplied Spec flywheel
bolts. Torque pressure plate to flywheel spec is 12-20 Lb-Ft.
The kit comes with the proper length bolts for the bell housing. The
upper left bolt is just under 1" and the upper right bolt is 1.25"
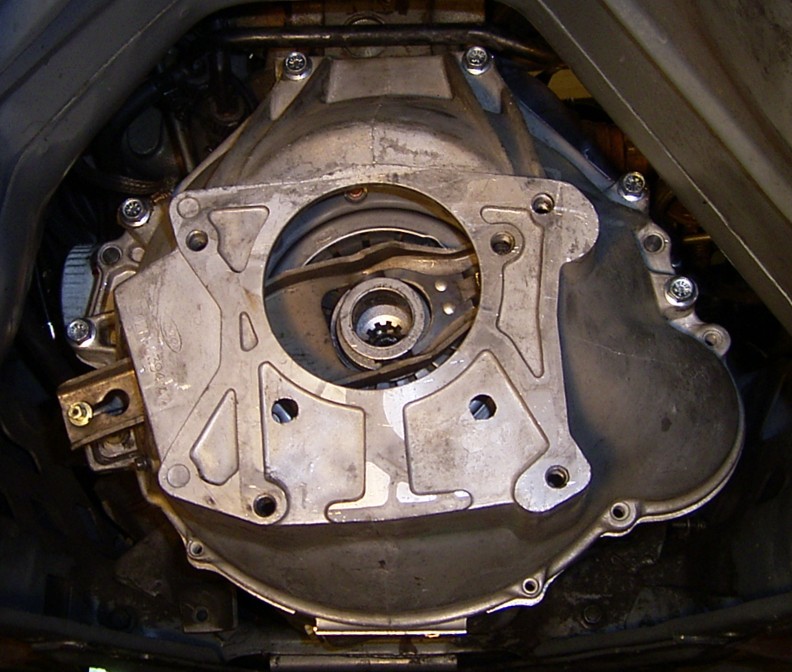
Test fit the bell housing to make sure everything is clear and the plate
rests flat on the adapter.
Install clutch release arm with throw out bearing in bell housing, install
bolts and torque to 38-55 Lb-Ft.
I had to purchase a 5.0 clutch cable and install it under the dash.
Make sure you have the starter bolts for the 5.0 bell housing, they are SAE, not Metric.
You will also need the two bolts that bolt the bell housing to front cover on the bottom of the bell.
I actually reused the 2.3 starter. It bolts in the 5.0 bell housing and works just fine.